Sunday, 30 December 2012

Going without make up. Bare faced Freedom.

GoingWithout Makeup:
 Bare-faced Freedom


Considering I own such a lot of make up and talk so passionately about the subject, people are always surprised at how infrequently I wear it. There is something ever so liberating about going bare faced, and here's why.

As a teenager I definitely felt self conscious and wore make up to improve the way I look but I'd say that it was as much of a social norm habit. It wouldn't occur to me NOT to wear make up. And I wore a lot of it. I was your quintessential bleach blonde extensions, orange bodied, too much bronzer teenager. 

When I was 19 I met an Australian guy and decided to move to Perth with him. I would straighten my hair every day, wear my extensions and go around wearing my normal face of make up (foundation, concealer, bronzer, blusher, eyeliner, mascara and lip gloss). However, I started to notice that none of my new female friends did the same. Don't get me wrong, they were highly glamorous, the girls in Perth had an effortless beauty; beach chic in every sense of the word. Day to day, they wore little to no make up.


Initially I would feel panicked if we went to the beach bare faced, but gradually moved to the pub as the day went on.. I'd find myself in a bar wearing flip flops and a beach dress with tangled sea salt hair and not a scrap of make up. It went against everything I knew.

A year later and I was wandering around the grocery store wearing a Bintang grubby men's vest, board shorts, no shoes on my feet and absolutely no make up. And I felt more confident, attractive and desirable than ever before. I'd go on a night out wearing tennis pumps and no make up. I felt free. I felt like I had tapped into this secret and being beautiful wasn't about how much effort you put in, it was feeling confident in my own skin. I can't lie, the tan helped a lot!


I used to read these interview with overtly sexy female celebrities, all claiming that they felt most attractive when in their joggers, lounging around the house without make up. I scoffed "bah! you can't fool me, vain beautiful liar". Until I experienced this 'enlightenment'. 

I came home to England and my friends didn't get it. I actually started to feel that make up was a big deception. That by wearing it, I was lying to the world about how I really look. One of my friends told me I was being rude by going out without make up! 


Then I got acne....


I no longer felt this smug confidence about my bare face. I felt ugly. I didn't just 'feel ugly'. I had an absolute conviction that I WAS ugly. Acne is a fail safe way of making anyone feel really low and insecure. 

No longer was I not wearing make up because I felt satisfied with my naturality, I became afraid of wearing make up. I didn't want to do anything to my skin that might make it worse. Even though I probably needed it (the acne was quite 'in your face' and the treatments only enhanced the redness), I shunned any make up. Even eye make up was a no no.. I didn't want people to wonder why, if I was wearing some make up, was I not covering my offensive face. 


I did try wearing make up for a night out... But the treatments made my skin so dry that foundation would cake and crumble, flaking right off my face. It actually just made me look worse. There are so many online tutorials for heavy duty spot coverage, but I couldn't master it without the flakes. I would give up, scrub it off, cry my eyes out and cancel on my friends. 

Having acne and not wearing make up wasn't 'difficult' because I felt like I didn't have the option to wear it anyway. I did feel like it affected how people perceived me, but in retrospect, I think it was a change in my own attitude which caused that.

My skin has been clear for about a year now and my relationship with make up has changed again. I'm not afraid of make up, and I don't feel like a liar and a fake when I do wear it. When I do wear make up, I look at it like art. I can change my face with the use of a few powders, like temporary plastic surgery! However I still feel more than comfortable going out bare faced, I don't cringe and avoid people I know... I'm not ashamed of how I really look! 

I think that in the end, we are all born with these faces. Girls are lucky, we have so many different makeup products to choose from that we have the freedom to improve the way that we look. But looks aren't everything. If we can't accept our young faces without make up, how will we deal when wrinkles inevitably mark the laughter and anguish of our past as we age? 

If I put a full face of make up on every day, I'd spend more than 1 week per year doing my make up... That's 1.5 years in a life time of just applying make up. Life is short, I have better things to spend my time doing than putting make up on my face and worrying about how everyone else perceives me. Having the freedom to choose to go without make up is a real treat. 


Showing make up free pictures of me to the world doesn't daunt me any more

I challenge you to go to work/college/school/university for 1 day without make up, please let me know in the comments section how it made you feel! Please feedback how you feel about going without make up! 


Saturday, 29 December 2012

Pink Butterfly Ombre Nail Art Tutorial

Butterfly Ombre Nail Art Tutorial 


Merry Christmas everyone! I hope you all had a wonderful holiday. 

One of the gifts I received was a nail art brush set (thank you bestie). For years now I've been improvising (poorly) with paint brushes, tooth picks and hair grips and may I say, they do not compare to the real thing. This particular set is from NPW. 

You Will Need:

  • Pink Nail Varnish (I used four shades of pink from light to dark, although using two shades in any contrasting values will work just as well)
  • Black Nail Varnish (for the detailing, although a Sharpie pen will suffice)
  • White Nail Varnish (for dotting)
  • A small sponge (I cut up cheap makeup sponges for this)
  • Dotting Tool (the head of a bobby pin/hair grip, a propelling pencil minus the lead... lots of things will do for dotting!)
  • Short striping brush (I used to use a very small paint brush and stripped lots of the bristles for a fine application)
  • Nail Polish Remover
  • Cotton Buds
  • A thick piece of card (for loading with varnish for dotting and striping)
  • Patience! 


Step 1 


Base coat. Paint your nails in stripes, light to dark towards the ends of your nails. You'll be sponging over this with more polish so this doesn't need to be neat! Allow each colour to dry slightly to avoid colour bleeding. Allow to dry fully before attempting step 3.


Step 2


Cut a piece of sponge about the length of your nail. Paint it thickly with your colours from light to dark. 

Step 3


Taking care to place the sponge the right way around, dab it onto your nail making sure to cover all of your nail. Dab the sponge with a light hand, moving it slightly up and down for a gradual gradient. This will no doubt get onto your skin; this can be removed later.

Step 4


When the gradient layer is fully dry, take a black nail polish and drip a few drops onto a piece of card. Use a thin brush or a short striping tool to create a half moon design. This should go from half way on your cuticle to a quarter of the way up your nail. 

Step 5


Using the same tool and black nail varnish, swipe carefully upwards from the half moon in four upward strokes. My thumb nail is wider; I used five upwards strokes for this. 

Step 6


Bridge the stripes with a sweeping arch. I did these quite high up but lowered them later when filling in the gaps to allow more space for the white dots. Fill in the tips of your nails in black nail varnish. This can be done with the striping tool, although this might give a slightly rough finish. A careful hand and a slip polish brush works well for this. Allow to dry


Step 7
Drip some white nail polish onto the cardboard. Use the dotting tool (or hair grip/bobby pin end)  into this and lightly dot a pattern in the black areas. At this point I took a cotton bud soaked in nail varnish remover and cleaned up the edges.


Step 8
Once all this is dry, apply two coats of top coat. Seal (paint) the tips of your nails for longevity. I usually use Revlon Liquid Quick Dry after this to accelerate the drying time. I know that Avon do a similar product to this in the form of a spray. 


When it comes to left handed nail art, things can get a little tricky. It is sometimes advised to keep your left hand (holding the brush) still and moving your right hand... Although I think this technique has a big risk attached to it. Try practising on a fake nail first, take your time and don't feel disheartened if things don't look perfect.

Wednesday, 14 November 2012

Formula for a Romantic Comedy

ROMANTIC COMEDIES ARE DUMB AND MAKE YOU DUMBER


I don't watch many romantic comedies. I actually walked out of How to Lose a Guy in Ten Days. They are predictable, sickly and an insult to femininity (of course, a gal's life just is not complete without a man to hold her hand through PMS and handbag shopping). 

I found myself thinking "who writes this stuff? Is it a conspiracy to scam women and under-the-thumb men out of their hard earned cash by releasing exactly the same film over and over again? Occasionally replacing Kate Hudson for Jennifer Aniston?". 
Probably not. But I'm going to continue to be scathing and present you with my formula for any successful romantic comedy. 


Act 1
Scene 1
A very brief and somewhat shallow character introduction. 

Girl: Beautiful but like, she totally doesn't know it. like! (Casting Couch: Jennifer Aniston, Kate Hudson, Jennifer Garner... you get the picture) She's unlucky in love and discusses men (and absolutely nothing else) with her less attractive friend (Casting Couch: Judy Greer) who is cynical and hilarious. But wait, attractive protagonist has a quirk! A strange pet, addicted to her job, she wears glasses... 

I'm ridiculously good looking. BUT I HAVE A FERRET! 
TWIST!


Guy: Awesome body, perpetual tan, either unlucky in love OR commitment problems (Casting Couch: Hugh Grant, Matthew Mcconaughey, Ryan Reynolds). Discusses his love life (completely realistically, guys definitely discuss romantic issues with their friends, like, all the time. Probably over cosmos). His friends are (Casting Couch: any up and coming comedian) chauvinistic yet witty. 

The women go nuts for me. Even though I have stupid hair. 


Scene 2
They meet. Instant attraction. Neither of them can believe how lucky they are that two super hot individuals could have found each other in this big lonely city. What are the chances! 

Scene 3
Montage. They walk along a sunny street holding hands. He buys something for her from a street vendor (balloon, hot dog, flower), she holds/eats/smells said item whilst grinning like a drug addict. They probably feed each other which is, after all, what romance is all about. They lay around in bed together like they have no job to go to (plus waiting to get to know each other before hopping into bed with them and sharing bodily fluids is so old fashioned and uncool)
Attractive female protagonist will do something clumsy. OH MY GOD IT'S TOTALLY ENDEARING. He falls in love with her. 


I like you! 
But let's drag this out for as long as possible. 


Act 2
Scene 1
Attractive protagonist gushes to her friend, who is witty and cynical about the situation. 
It is revealed that the guy has a secret that will probably be a deal breaker if he continues with the secrecy. He decides that dishonesty is the best policy. Girls are stupid anyways and she probably wont find out. 

Scene 2
She finds out. "Don't call me, I never want to see you again boo hoo hoo". She runs away with the style of a rag doll minus the stuffing. 

Scene 3
Ice cream, wine, cynicism from friend, crying. "How will I live without him, I'm just less of a person without a man in my life. oh em gee." 
He calls her but she doesn't pick up. She makes sure she experiences maximum amounts of pain by listening to his voicemails. 

"There have been complaints about a woman in the room above crying loudly"

Act 3
Scene 1
Starting to get over each other montage. Doing normal stuff (BUT! without crying) with Coldplay music in the back ground. Maybe she goes on a date but is completely rude and zoned out throughout due to her preoccupation to Mr Sexy Liar-pants. 

Scene 2
The guy's friend makes the sexy liar realise that he CAN get her back, all he has to do is stalk her at full speed and give a tearful speech about how much he loves her and can't live without her. 

Scene 3
CHASE SCENE!!!
The girl is at a train station/airport/getting into a taxi/ferry crossing...? She buys her ticket, she walks slowly to the mode of transport, she looks around then sighs. OMG I don't think he's going to make it!
He makes it. Just in time. He gives a speech (I love you, I can't live without you), he cites her quirk and tells her that it makes him love her more (hooray, he doesn't only love her for her good looks). 
By this time there's a crowd. Girls love having strangers (especially public transport strangers) knowing intimate details about their love lives. 
They both cry. They kiss. The crowd cheers. 

She got off the plane! The whole world cries.


Montage of happy photos of them together. They live happily ever after! (For the next few months at least man!)

THE END 

Other variations
-Reverse the roles for the girl and the guy. 
-There are two potential suitors, one is good looking and a tool, the other is unconventionally good looking, caring, thoughtful and kind and most importantly, overlooked by the girl for the latter features. Attractive female protagonist eventually realises that love was right in front of her all along (again, women are stupid aren't they!)

Summary
I don't like rom-coms because they are patronising, simplistic and just plain boring. Another reason that romantic comedies annoy me is that they give girls women and teens this completely erroneous view of men and relationships. Being a husband/boyfriend/wife/partner isn't all romance and everyone being on their best behaviour. These films make women think that they should put their men on a pedestal and should they fall short of their sky high expectations, they should get rid - if he's not Prince Charming, he's an idiot. 
Girl 1: "oh my god, my boyfriend looked at Jennifer Love Hewitt's breasts on TV again today"
Girl 2: "girrrrllll. If he has eyes for anyone else but you, you should kick him to the curb. He needs to show some respect". 

Well excuse me but aren't we all human? I just think that it's really unhealthy for girls to go around thinking that there are no expectations of them, but that their boyfriends should constantly be buying them flowers and complimenting their new dresses. Can you imagine how exhausting it would be to keep that level of romance up long term?! 
By encouraging girls to keep looking for the perfect guy, they're just going to be disappointed. I'm not saying that any girl should 'settle', but that they should remember that no one is perfect - guys' minds work very differently to womens' so don't expect them to be like Hugh Grant from the movies because that character was written FOR women. Be understanding, not demanding. 

"I'm 16 and can't wait to give up my family, friends, whole world for a guy I saw one time but never spoke to. So what if I can't talk to him? All I have to offer are my looks (my pretty face) and no guy is interested in what I have to say anyways. lol"


Romantic comedies are just NOT examples of good film making. However, I did go and see Tinker Taylor Soldier Spy, a critically acclaimed arty film. I slept through nearly all of it. £8 well spent. 


Tuesday, 6 November 2012

Tips and Advice for growing long hair

Tips and Advice for 
Growing Long Hair

Whilst I have had limited success in growing my own hair out, in the pursuit of what I call 'mermaid hair' (hair that goes past the chest), I have picked up a few tips for making sure that hair grows at an optimum rate. Here is a small list of hair facts:

  • Average hair will grow half an inch per month (1.3cm)
  • Hair usual goes through a three month shedding cycle, mine is during the autumn
  • Hair has a terminal length, a point at which it won't grow any longer. This may be longer than you think if you are committing any regular hair 'sins'.
  • Products which claim to repair your hair are completely lying. Hair is dead, a split end cannot magically heal itself. These products may improve the texture of the hair which can prevent future splitting but it won't fix what is already done.
I have committed a great deal of hair sins: I used to cut my own hair, sometimes with nail scissors! I bleached and highlighted my hair for 9 years; often doing this at home. I straightened and blow dried at least every other day. I glued rows and rows of extensions into my hair, removing them by conditioning and yanking out...

I cut and dyed my own hair, used extensions and here I'd actually back combed the ends. How naughty...


For the past year I have been trying my hardest to get my hair into good condition and to achieve my dream of mermaid hair. I stopped dying my hair (thank god the ombre/dip-dye look is trendy right now!), I only use heat in emergency cases (blow drying on cool setting) and I get regular hair cuts. I never tie my hair with an elastic band or bobble; I use crocodile clips or hair sticks.


This is my hair currently (November 2012) - I had my hair cut last week.


Here are some tips in a nice organised list

1. Get a hair cut. Split ends, left to their own devices, will split further and further up the shaft. To stop them in their tracks, cut off as much of your damaged hair as you can. It gives you a fresh start. Contrary to popular belief, getting a hair cut will not 'make your hair grow faster', rather it will make your hair break off more slowly. I bought some professional hair dressing scissors and occasionally go over my ends and snip just about a split (in between visits to the salon)

2. French plait your hair at night. For those who toss and turn at night, your hair will be getting tangled and damaged as it is rubbed against your pillow or being snagged. Go one step further and invest in silk or satin pillows to really reduce snagging while you're sleeping

3. Be really careful with your wet hair - don't brush it or scrub at it with a towel. Washing your hair will loosen your pores on your head making your hair shed more easily (ever noticed how much you shed in the shower?!). Scrubbing and rubbing with a towel is a big sin; it will tear and damage your hair. I usually wrap my hair in a towel and gently squeeze, then wrap my hair up in a 'turbie-towel'.

4.  Avoid heat at all costs. Straightening, curling, blow drying, crimping (if anyone is reading this from the 90s), all of these weaken and damage hair significantly. Have you ever noticed those short sticky up bits around the front of your face? They aren't new baby hairs they are broken strands that have suffered the extra attention you give your bangs/fringe with the straighteners. 
Try to let your hair dry naturally and use a serum to make sure it dries less out of control. I usually prepare my hair by styling it at night (I rag roll my hair for a blow dried effect in the morning)


If you really really need to use heat on your hair. Make sure you invest in a good heat protectant and use it liberally!


5. Don't colour or dye your hair. Especially lightening it! Bleaching your hair strips it and makes it weak and prone to breaking. Any hair colour will expose your hair to chemicals which will not encourage it to grow long. 

7. Stop using hair bands/bobbles/elastic bands to tie up your hair. Have you ever noticed that 'kink' when you let your hair down from a pony tail? Have a close look... Can you see the broken hairs? When you tie your hair up, split the pony tail in two and pull tight, you're snapping the hair at the outer edges of the pony tail AND putting a lot of stress on your roots. It's a shame because I love the look of hair in a high pony tail or a doughnut bun... Any look that involves a pony tail anchoring your hair up is hurting your hair. 
I've started using crocodile clips/kirby grips (bobby pins) and hair sticks to secure my hair into a bun. The crocodile clips and hair sticks are even good enough to keep my hair up when I'm at the gym or running. It doesn't look as good but I can't wait  for my hair to grow out and get rid of those short broken ends that make my hair look like an intense Farrah Fawcett do all the way down..


9. Don't over brush - brushing your hair 100 strokes every day is a really strange concept since brushing will put pressure on your roots and encourage weak hair to break. The benefits of brushing are to distribute oils from your roots to nourish the ends (yack) and to de-tangle. Over brushing will give you zero benefits. Brushing as little as often with a wide tooth comb or boar bristle brush is the kindest thing to do for your delicate hair. 


10. Don't back comb - this tears at the shaft! 

11. Give yourself a head massage when you're washing your hair. Don't pile your hair up and scrub - this will only tangle. Just gently use your finger tips to work in circular motions over your scalp. This will increase blood flow and help to maximise growth. 

12. Water temperature: Using water that is too hot will not only open your follicles and increase shedding but this heat will damage your hair (doesn't it seem like everything damages your hair?!), use as cooler water as you can handle when washing. A great tip to decrease shedding and close your follicles after washing is to blast your hair with cold cold water. I lean back to make sure my whole body doesn't get the front of this - I like a good morning wake up but I don't want to catch hypothermia. or die...

11. Do eat a balanced diet. I've tried taking vitamins and supplements and even eating tofu but none of these made a real difference. However, the rate of your hair growth will definitely depend on being healthy on the inside. It's well known that people suffering with anorexia experience problems with hair growth (hair loss and excess body hair) so it goes without saying that keeping yourself well nourished from within will contribute to lovely healthy locks. 

14. Let your hair get dirty - as I mentioned before, washing your hair encourages shedding so washing your hair as infrequently as possible will therefore discourage shedding (duh), also, letting your hair get dirty and brushing the natural oils through your hair will actually encourage healthy growth as well as acting as an unattractive serum. I tend to wash my hair every other day (it's all I can manage, my hair is more oily than my face!), but the longer you can leave it the better! Dry shampoo is your friend. 

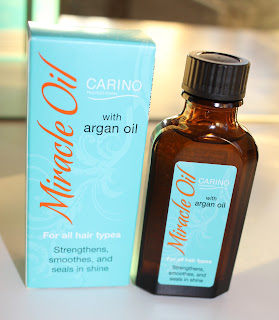
15. Use the right products. I'm not a scientist or a hair dresser so I am not an expert about this but I do know that silicone is bad for your hair. I do think that the more you pay on a shampoo, the better it is. However, that's not to say that drug store/high street shampoos are no good. Whilst I acknowledge that my hair felt so good and soft using Lee Stafford shampoo and conditioner, it doesn't exactly revert to looking like a bail of hay as soon as I start using Herbal Essences... Additionally, Moroccan Oil was without a doubt the greatest hair oil/serum I've ever used but it cost a fortune! My Aldi Miracle Oil was a whopping 85% cheaper but does a very similar job. 


16. Hair masks. Now and again I'll smother my hair in something intensely moisturising and leave it on for a few hours just to put some life back into it. It really softens it and makes it feel healthier which hopefully will help it split less these include:
Lee Stafford 'for hair that never grows past a certain length treatment' 
Avocado, Olive Oil, Egg yolks, Mayonnaise - moisturising
Beer, Egg white, Apple Cider Vinegar - clarifying


Hopefully this has been helpful, if a little long winded and boring! If anyone has any products they recommend for growing long hair or tips for keeping hair in good condition I'd love to know about it!!


Rag Roll Hair: Organic No Heat Styling Tutorial

How To: 
Rag Roll Hair
Organic No Heat Styling 
Tutorial

When I decided to really put some effort into growing my hair, I basically stopped using heat on my hair at all. I encountered some problems with this: my hair always looked messy... I couldn't wear my hair down because it looked so scruffy. Additionally, I was french plaiting my hair every night to keep the condition good and would end up with different sized kinks that looked pretty rubbish. 

The first time I came across the concept of rag rolling in the My Naughty Little Sister books and never forgot about this old fashioned way of styling hair. 

My tutorial for rag rolling isn't for tight ringlet curls, I just wanted loose waves and a controlled style: Therefore I use very thick rags and rather few of them. I've been doing this for such a long time I felt like I really should post a how to tutorial on how to rag roll curl your hair!

You will need:

  • Some old material (I cut up the legs of some old primark linen trousers)
  • Scissors
  • A brush


First cut your strips of rags. I cut mine to approximately 6cm wide and 25cm long (the longer the strips the easier it is to tie them at the end.

I always start with totally dry hair: I've experimented with wet hair and it's too unpredictable.... always too tightly curled, inconsistent, jaunty angles. 

Brush your hair through so that it's easy to section. 

I recommend starting from the top and working downwards: The top of your hair is the bit which is on show so making sure your top layers are split into equal sections is quite important. 

please excuse my bare face and attractive onsie pajamas!

Take a section of your hair: I take about 2 square inches (sorry for switching between metric and imperial, I'm so thoroughly English!)

I take a rag and pinch it between my two fingers (middle and pointer). I wind this around my two fingers from the end of my hair down to my scalp. I secure the end of my hair with my ring finger. I make sure to leave about an inch of the ends of my hair hanging out of the loop to make sure it hangs nicely in the morning. 

This next part is quite tricky: I secure the wound hair with one hand and tie the rag with my other (usually my left but which ever is easiest for you). There is no special easy method for this, rag rolling hair takes a lot of practice. Soon you will find that curling your hair this way is the easiest thing you've ever done!

Rag Rolled Hair

The pattern I tend to use is to start at the front (leave this if you have a fringe or bangs) and work backwards until I reach the crown. 

I then section the remaining amount of hair in two horizontally (two very large sections from one ear to the other).

I continue to work top down: splitting the top horizontal section into three and then two or three on the lower section depending on how much hair. I try my best to evenly section amounts of hair (I really hope that makes sense!)

Tip! If you can, place yourself in front of a mirror with another mirror behind you, angled so you can see what's going on at the back of your head. 

Rag Rolling Hair


Once all my hair is secured I go back over the rags pulling them tight. I also tend to pull some of the hair so that the loops created are as big as I want them - that comes with experimentation and personal preference. 

Then, I take myself to bed (in the pictured Christmas onsie!) and sleep on  it. It's not as uncomfortable as it looks!

*Warning* This look will NOT please your partner/boyfriend/husband (that goes for both the hair and the onsie)


When I wake up I usually get myself mostly ready to give my hair as much time as possible to become set. I often spritz over with a hairspray to give it optimum hold. 


I release the curls from the bottom up, gently winding them down. 


I give my hair another spritz of hairspray (I use Tresemme Freeze Hold - it's amazing!)


I then give my hair a bit of a jouje (that's wasn't a word before but it is now), separating some of the waves out and breaking up the sections. 


And this is the finished look - I do this about three times a week and it works really well as a style for the morning hurry. It saves me a shed load of time. 

Actual timings:
Night time rolling: 3-5 minutes
Morning unrolling: 1-2 minutes including the 'joujing' and spritzing. 

To keep the look more modern, I sometimes run some wax or putty through the ends and a little at the root to give it volume and keep the waves more separate. 

Would love to hear if anyone else has organic no heat styling tips!

Abi Girl x


Monday, 5 November 2012

Review Rimmel Lipstick Kate Moss Shade 107

Review Rimmel Lipstick
 Kate Moss Shade 107
 

I bought this on the recommendation of Zoella after seeing her wearing it in a youtube video. It was exactly the colour I'd been looking for, a sultry dark raspberry red.  


I don't wear red lipstick a great deal (my top lip is quite thin and I feel like wearing red lipstick draws attention to that...) but the reds I do have tend to be a little drying. This is sooo creamy, I'd go as far to say that it is moisturising. 

No Flash - very true to colour

I love the colour, it's so rich and classy looking. I've been wearing it far more than I've ever worn other red lipsticks. I feel like it's the perfect colour to wear in this autumnal season. The colour pay-off is amazing, very highly pigmented. 

The packaging is OK. I do have a complaint... the lipstick became detached from the shaft as soon as I got it home. I'm disappointed but more so that I threw away the bag with the receipt in. It means I can only use it with a brush to avoid a clown mouth scenario...

With Flash - it's much darker than this in real life!

It lasts for absolutely ages, however I have started wearing this with Lipcote which really prolongs the wear of this even more so (although does make it a little drying)

I very lightly daubed it onto my lips then blotted for a stain - just for the sake of versatility... 


For only £5.49 this is awesome value for money. If you're looking for a classy, vampish dark red lip that really doesn't look over the top I really highly recommend this!


Rimmel Kate Moss Lipstick Shade 107 - My Holy Grail Red Lipstick 


Related Posts Plugin for WordPress, Blogger...