Friday 22 February 2013

Review | Rimmel Apocalips Lip Lacquers | Abi Girl

Review:
Rimmel Apocalips Lip Lacquers 
(with swatches)

I know, I know, there are already a plethora of reviews for this product. But these lip lacquers are so amazing I couldn't resist giving my little 2cents worth to the internet, such is my love for Rimmel Apocalips! 


The concept of a lip lacquer is almost like an extremely pigmented tinted lipgloss. Actually it's like a lipstick and a lipgloss had a romantic fling and the love child is this perfect combination of colour and glossiness! 

The way these work... It's very unique. They go on like a thick gloss. They shine, they reflect, they make your lips look like shiny sweeties! Then, after about an hour, the gloss will wear off and you're left with this very strong colour. Like a lipstick! Obviously you can re-apply to get that shine back but if you've not got the tube on your person, or if you forget, you still have this beautiful colour left. 


They act almost like a stain... although if you're thinking 'stain' that leaves your lips faintly but permanently coloured for days, think again. The stain lasts as long as you want it to. It The colour wont come off on your drinking glass but will easily come off with your normal make up remover or even a thoroughly used tissue!

The colour range is really good, eight shades including nudes, pinks, reds and mauves (and one orange shade for good measure!)

The colours I went for are Nude Eclipse, Galaxy and Apocaliptic:


Nude Eclipse
This is a very true nude, it's a cool pinky almost greyish hue. It's a perfect every day nude, the gloss. Whilst this colour isn't as strong as the rest of the colour range, the 'lipstick' colour that remains once the gloss is gone is still strong. As with all nudes, you'll need to make sure that your lips are conditioned to avoid that white residue look! (I hope you guys know what I mean by that!)


Galaxy
This is a very deep plum colour. I think it's so sophisticated, dramatic but subtle at the same time. It's definitely a more grown up colour than the others in the range. It goes on very strongly but once the gloss fades, the colour becomes more 'lived-in' and, well, more wearable. 


I think this shade is perfect for day or evening. I do think it might suit warmer skin types more than cooler but don't let that put you off at least giving it a try!


Apocaliptic
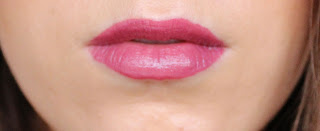
Since this shade is eponymous for the product, I would probably say that Apocaliptic is the flagship colour for these lip lacquers. I just couldn't resist buying it, it's so striking and wild! I don't think my photos do it justice, my boyfriend describes it as red but I'd call it a cherry pink, fuchsia in some lights. 


This looks so shiny and luscious on the lips, and the colour gives such a POP to your face. I could pair this with a very minimal makeup look for a modern twist. 

I must say that with this colour especially, you need to be very careful with the way you apply it. You can't do this whilst walking, or without a mirror... At least not very easily. Take care when putting this on to avoid a Joker smile :)


Price
These are £6.99 each, although I picked mine up on a 3 for 2 offer at Boots. For such an amazing product the price is just fantastic. I may even go back for more colours!

Packaging
The packaging is interesting... I love that the colours are easily visible in the tube, it makes it easy to find the colour I want. The doefoot applicator is great, it makes it so simple to apply neatly and precisely. I usually like my lipsticks/glossy to be simplistic and classic by the way of packaging and these are very, gimmicky, however I won't let that stop me from loving these badgers!


Summary
I love them. I don't know what else to say! Go buy these. I'd like to add that I bought these with my own money and receive zero monies for this review, I genuinely think they are awesome. I heard a rumour that these are a dupe for the YSL glossy stains, I cannot comment on this I've never tried them and why would I?! These are so cheap they tick all my boxes!
They smell nice, they feel glossy, not at all sticky. SO reasonably priced. This is just a rave review for the truly splendid Rimmel Apocalips Lip Lacquers. I always thought I was a lipstick girl but I think I'm almost converted to the lip lacquer trend! 

Have you guys tried these? Which colours are your favourites and which should I buy next?!


How to | Tint/Dye Your Eyebrows and Eyelashes Tutorial | Abigirl

How To Dye / Tint Your Own Eyelashes and Eyebrows (Tutorial)

*I am wearing foundation in the after shot, but absolutely 
nothing on my eyelashes and eyebrows!*

I've been tinting my eyelashes and eyebrows for about three years now. Every 8-8 weeks it's a bit of a ritual for me. The subtle effect just makes me feel that much more confident about myself without make up on. Additionally, since I've started dying my hair dark, my fair eyebrows just don't look right against the mahogany of my hair! 

The cost of having this done at a salon is at least 10x more expensive per session than doing it yourself. Additionally, the way I apply the dye, I keep my eyes open and apply like mascara. This way I can get on with my chores while the dye is working away. When I had my eyelashes tinted at a salon, my eyes were closed during the application, and the technician kind of soaked my eyes with the dye. It got into my eyes and hurt like a female dog! Plus, she painted over my expensive manicure with a strange iridescent blue colour while it was going on, I was too polite to say anything (being British and all) as she felt like she was doing me a favour :(

First things first: Safety. Make sure you do a patch test before using any eyelash dye product. One of my eyelash dyes actually says 'POISON' on the tube, so be very wary. You only get one set of eyes in your life so be extra careful. On the box it will say to do a patch test behind your ear 24-48 hours before using on your lashes. 

Choosing the product. I've used a range of products but I can highly recommend Eylure in dark brown and black (I've not tried blue-black so cannot vouch for it, although I've heard wonderful things!)

What you'll need: 


The dye kit will consist of:
  • Dye (obviously!)
  • Accelerator fluid
  • A spoolie/applicator wand
  • A mixing tray
Extras that I use are:
  • A clean mascara wand
  • Egg cups (I find them easier to clean and mix in than the flimsy plastic tray provided)
  • Vaseline (very important)
  • Q Tips/Cotton buds
  • A watch/timer. Something to keep an eye on development time
  • Cleanser 
  • Cotton pads
I generally dye my eyebrows and eyelashes in the same session. I use black on my lashes and Eyelure's dark brown eyelash dye for my eyebrows. 

Step 1
Mix your dye and accelerator fluid. Again, I do this in an egg cup purely because I can work a little harder with the spoolie to mix it more easily. Make sure you're using more accelerator than dye, the ratio varies from product to product but generally it's 1:3 I think. 


Step 2
Prep your eye area. Using a q-tip/coton bud or your finger, buff vaseline into your eyelids and any skin around your eyelashes that you DON'T want to be stained black. If you skip this step, you run the risk of having a permanent 'I slept in my make up and have dramatic panda face' look! 
This step should be repeated around your eyebrows. It's really difficult to get rid of the stain so be prepared!
That being said, try not to get vaseline on the hairs that you want to dye. Since the vaseline acts as a barrier to the dye, you don't want to get the vaseline on your actual lashes/brows!


Step 3
Apply the dye. For my eyelashes I use a old clean mascara brush. I just find that the fat wand gives me a better application, but that's just my humble personal opinion. I roll the wand in the dye and place the brush at the base of my lashes (being careful not to get any in my eye!). I then shake/zigzag the brush up my lashes from root to tip. 
I then look down and do the same from above. I do this because my lashes are noticeably blond at the roots when I look down (see the before and after, I didn't quite manage dying that on this attempt!)
For my bottom lashes, I do the same but try to use the end of the brush for a more precise application. 

I then roll a cotton bud in vaseline and clean up the dye on my skin, going back over with the dry end to extra sure I don't dye my eyelids!


Step 4
Waiting! On the box it recommends a 5-10 minute development time. However I generally do 15-20 minutes. I experimented and increased the time gradually, finding that 10 minutes just didn't give a dramatic enough look for me. This is where the timer comes in. 

Step 5 
Eyebrow time! The wait time for eyebrows is 1-2 minutes. I stick to this! First time I did this I thought "phhffftt, that cannot be long enough!" and left it on for 5 minutes. As a result, my lashes went from blonde to black. My mum said to me "Abi you need to take off that eyebrow pencil it's too dark". I had to awkwardly explain that it would look that way for 6 weeks. Oops! 


I start mixing the eyebrow dye about 5 minutes before I want to take off the eyelash dye. This way I can apply it (with the smaller spoolie), let it develop and then remove both the eyelash and eyebrow dye simultaneously. 

Step 6
20 minutes after I finished applying the eyelash dye and 2 minutes after applying the brow dye, I'll squirt some cleanser (in my case, Cetaphil) onto a cotton pad and swipe off the dye. This part can sting so be careful! I usually wash my face with warm water to make extra sure all the dye is removed.

And voila! Subtle but noticeably darker brows and eyelashes!


I can't ever see myself not tinting my eyelashes and eyebrows, I think it just enhances the way I look without make up on. If I'm having a really lazy make up day I can just apply 8 hour cream/vaseline as a clear mascara to my eyelashes to give them extra length. 

Hope you found this 'how to dye your eyelashes' tutorial helpful/interesting! Let me know if you have any questions! 


Saturday 26 January 2013

TAG | What's In My Bag

The What's In My Bag Tag


I made a youtube video detailing what I have in my handbag. I retrospectively decided to write a blog post about it too. There are a few extra items in my bag compared to in the video so I'll give you TEN points if you can spot them! 


First things first, the bag! I bought this bag over the phone from Michael Kors in America. I'd been trying to find the Bedford Bowling Bag in this colour (tan) for months but eventually House of Fraser and Selfridges sold out of all colours. I initially panicked but underestimated my ability to pick up a phone and talk with my mouth. Duh! I showed my Mum a photo of this bag and she decided she needed one too. So we now carry matching handbags. Which is totally cool... Isn't it?!?!

I absolutely love this bag, I carry it everywhere. It's the perfect size to throw all of my things into, without being over sized and bulky. There is a shoulder strap which I removed and stored in the dust bag. 


This is the Marc Jacobs Classic Q Zip wallet. I wanted this SO badly for Christmas and dropped not so subtle hints about this to my boyfriend (the hint involved me adding it to an online shopping basket and asking him to enter his card details... one year he went shopping for my Christmas present on Christmas eve whilst being quite drunk. The results were weird, we still can't work out what it is...)


The purse opens right out, it has an internal zippy coin section, lots of slots for notes and the card slots too. I still need to put a photo in the window! It's the perfect size for cheques and notes (if I ever had any... shopping habits make me poor!)


I keep a makeup bag fully stocked, for just in case times! I try to only keep things in here that I'll genuinely use when I'm out and about. I'm not usually one for reapplying makeup, I try to do a decent job when I first put it on you know?! 

  • Clinique Pressed Powder - I have really oily skin so this is an essential. I use loose powder at my vanity but if you've ever taken loose powder ANYWHERE you'll know that it just can't be trusted! 
  • Max Factor Blush - I usually use a NARS blush (Dolce Vita), this is nearly a dupe for that. I just wanted a cheap version to avoid any smashed pan disasters! 
  • Collection 2000 Lasting Perfection Concealer 2 - Everyone in the blogging world either has this or has heard of it. It's the BEST drug store concealer out there. 
  • Rimmel Lasting Finish Lipstick in Asia - I use this as a cream blush, for more info see this blog post! http://abi-girl.blogspot.co.uk/2013/01/review-rimmel-lasting-finish-lipstick.html
  • Yves Saint Laurent Rouge Volupte Lipstick, it's a very pale creamy shade (I forget the shade) but it's my HG nude. 
  • Eco Tools Blush Brush
  • Elizabeth Arden Eight Hour Cream (Review here: http://abi-girl.blogspot.co.uk/2012/10/elizabeth-arden-eight-hour-cream-skin.html)
  • Soap and Glory Hand Food - The nicest smelling hand cream ever! 
  • Random Perfume Samples (Including Givenchy Ange ou Demon which is my favourite ever perfume!)
  • Plasters and Paracetamol. The plasters are mainly in there to cover my tattoos, just in case I'm in school and I need to tie my hair up (I have a tattoo on the back of my neck)
  • Vaseline and Moisturiser. I don't ever use these so they will not be going back in, sorry chaps!
  • Coffee samples! I collect these from hotels, sometimes when I'm in school I am just desperate for a coffee and it's usual for teachers to bring and label their own teas... 
  • KFC wipes - free versions of wet wipes. I ask my family to collect these for me, as I don't eat fast food.

My car keys! I drive a Citroen C3 which is baby blue and covered in flower decals (my boyfriend and father HATE it when they have to drive it). The Owl is a little USB, it's so CUTE! I bought it from amazon I think... The pirate keyring was in a home made cracker, my boyfriend's mother made personalised Christmas Crackers last year, and I LOVE pirates of the Caribbean. Also my library card and Tesco club card. 


My various Ray Bans... I have my prescription ones for driving (although my eyesight is getting so bad it's usually an all day thing now) and my Ray Ban Cats, which are not prescription. Therefore when I am driving and it's blindingly bright, I have to wear my sunglasses over my normal glasses. It looks ridiculous. Maybe it's time to get contact lenses?! 


Well, that's what's in my bag! I hope you liked this post/video. Let me know what you keep in your bag! Do you have any essentials that you can't live without in your purse? 


Friday 25 January 2013

NARS Blush Dolce Vita Review, Photos and Swatch

NARS Blusher Dolce Vita Review


I was a NARS virgin until Christmas this year! I always thought the brand was rather expensive and as a student, I need to be thrifty with my money! My sister bought me this for a Christmas present and MY GOSH! This is my absolute HG Holy Grail blusher! 

I tend to go for richer darker shades of blush since my skin is a bit too yellow toned to carry off light pink tones.

Colour:
Dolce Vita is a burnt mauve deep shade. The colour pay-off is RIDICULOUS! You literally only need to show your brush to the pan, you'll still need to tap off to avoid clown make up effect!


Application:
As I said, Dolce Vita is a very strong shade so use your brush very lightly in circular motions to avoid any strong lines. 

Packaging:
The packaging feels really hard wearing - I don't have any worries about slinging it in my handbag. It has a tendency for getting a bit grubby - the plastic is a kind of soft tactile plastic (does that even make sense?!)

Price: 
Nars blushes are £21, although they are available from ASOS in most colours and are included in student discount! Now and again ASOS do 20% discount, so definitely check out their make up and beauty ranges then for a bargain!

Staying Power: 
You absolutely won't need to reapply this later in the day. This is a warning! A few weeks ago I was out for drinks with the girls and I felt the need to reapply my make up. My wine induced heavy hand caused me to give myself a crazy pantomime dame make over, I used a million tissues trying to remove it! 


Summary:
I definitely think this blush is worth the price, with the amount you need to use per application, I think this might last me 'til I die. The colour is gorgeous, it lasts all day long! Just be cautious with the application! 

Let me know if you have any recommendations for other NARS products, I am really keen to try some new ones out! 


Saturday 19 January 2013

My Art (Uni Art Exhibition)

Hi Everyone!

Sorry it's been so long since I've made a post, I've been super busy getting ready for my Art exhibition! 

I'm currently in my final year of university, I'm training to be a primary school teacher. I specialise in Art so this double module was a lot of work! 

I thought I'd share my paintings with you, they are of my Dad, my Uncle and my Grampy. They are all oils on canvas, with OS maps bonded to the canvases. 

The inspiration behind my pieces was examining the stories you can read about people’s lives on their faces. The maps were meant to be symbolic of the journeys people take and how they show on our faces as the journeys continue. I looked at pictures of these celebrities who use fillers and botox to iron out their wrinkles and it made me feel a bit sad... It's like their ashamed of the lives they've lived! Smile lines are a testament to the happy memories and experiences we have had and those frown lines are proof of the trials and tribulations that have resulted in the wise experienced people we are. 


I wrote a poem to accompany the paintings: 

What can we tell about a face?
To gaze upon it and then trace
Every smile that left its mark,
Frown lines hint at times of dark
For times we've cried, for times we've laughed
For all the struggles and the graft
Etched yet deeper on the skin
So different from whence time begin
A wrinkle's more than just a line
It shows the passage of our time
Denotes the journeys we have taken
Ongoing voyages to awaken
A facial autobiography
Composed like stark cartography


I hope you like them! I'll be back posting as normal from now on!


Sunday 6 January 2013

Review: Lee Stafford Hair Mask For Hair That Never Grows Past A Certain Length Serum

Review: Lee Stafford 
Hair Mask 
For Hair That Never Grows Past A Certain Length Treatment


"If the earth's not nourished, you'll never grow beautiful flowers"

Don't you just love everything from Lee Stafford?! The colour scheme and the smell really appeal to my girlish side. I've been using his line sporadically for... gosh nearly ten years (I feel old!) when I used my friend's Lee Stafford Heat Protection Spray and immediately had to go buy myself a bottle. 

Background: 
I am always on a mission to grow my hair to what I call 'mermaid length'; I want to have my hair grow long enough to cover my chest. However, with eight years of bleaching, straightening, curling, back combing and giving myself bad hair cuts (the BIGGEST hair sins!) I knew that was an unrealistic goal. For the last year I've been trying to do everything right. I stopped bleaching, I only use heat on really special occasions (once a month tops) and I get professional trims every 7-8 weeks. I'm telling you this because I feel like all of the good things I've been doing to my hair have to be accounted for when I tell you that my hair HAS been growing longer than before, a fact that cannot be attributed to any one thing, including the Lee Stafford Hair Mask Treatment in this review. 

What it claims it does:
  • Vital hair and scalp complex helps to reduce hair loss
  • Improves follicle health which in turn increases ability of the hair to anchor to the scalp
  • Soothing formulation reduces irritation and moisturises the scalp
  • Addresses hair and scalp ageing at a cellular level
  • Improvement in tensile strength to give body and texture by penetrating the hair reaching the inner cortex
  • Improves volume and feel of the hair


Directions: 

The directions state that this treatment should be used in between shampooing and conditioning, massaging into the hair from the roots to the ends, leaving for 5 minutes. 
I really can't understand using this product in the recommended order... Using it on the roots after shampooing means that no matter how long I spend washing the product out of my hair, the residue causes my hair to be far too soft at the roots meaning it gets greasy after a day and hangs really limp. It definitely doesn't improve the 'volume' of my hair as claimed!

Stafford states that you should use an egg sized amount every wash 'until hair improves' then once a week to maintain the improvement. Now, this tub contains 200ml. Assuming that Lee isn't referring to quails eggs, this contains about three egg sized amounts. For hair my length (it comes down to an inch below my armpits), I really do need a medium/large egg amount of product to cover my scalp to the ends of my hair. If I was to use this every wash, I'd have to buy a new tub every week! 

What it actually does

The Good
  • It leaves my hair feelings SO soft and silky. It definitely improves the feel of my hair, and smoother hair means its less likely to split
  • As with all Lee Stafford products, it smells amazing. Even using a different conditioner after this treatment, my hair reeks of this when it's dry

The Bad
  • I always experience a certain amount of shedding in the shower (is there a bleaker, grimmer chore than fishing out the matted disgusting hair from the plug hole...?!), but whenever I use this I experience a noticeably HIGHER volume of hair loss. I feel like applying a conditioner directly to my scalp (as directed) is lubricating the follicle to facilitate easier hair loss!
Packaging: 
I love the pink, but I HATE anything in a tub for the shower. I simply don't have enough hands for this to work. I have to unscrew the lid with one hand, scooping the product out with the other, then quickly, one handedly screw the lid back on trying not to drop the product or get any water into the tub. Did all the hair product retailers have a meeting and conspire to package ALL hair masks in these inconvenient tubs, in order to encourage clumsy showering ladies like me to drop the product and have to repurchase more often? Mr Loreal says "what's wrong with squirty bottles? They work for everything else in the shower...". "You FOOL Loreal, don't you know that makes it considerably easier for application! MWAHAHAHAHA" laughs Lee Stafford. 

Consistency:
Very viscous and thick, it feels luxurious.

Price:
£7.99 from Boots isn't too expensive compared to other hair masks, although since you need to use such a HUGE amount for each application, it makes it at least £2 per use! Maybe for ladies with shorter hair, or if it was only used on the ends it might be worth the price?


Over all thoughts:
Whilst my hair is growing longer than before, it's not growing any faster than the average inch every two months. It's one of the nicest hair masks I've used in terms of scent, consistency and resulting silkiness of the hair, although with the imminent post-use lanky greasiness and the ridiculous amount one must use, I don't think it's cost effective. I won't repurchase, although I'm still a big fan of the Lee Stafford range. 

What's your favourite Lee Stafford Product? 


*Disclaimer* I purchased this product myself. I do not do sponsored posts. All opinions are my own.

Wednesday 2 January 2013

Review Rimmel Lasting Finish Lipstick Asia (As a Cream Blusher Contour)

Review Rimmel Lipstick Asia 
(As a Cream Blusher Contour)

Rimmel's Lasting Finish Lipstick in Asia is a very popular mauve toned nude colour; I've often found it totally out of stock in Boots and Superdrug. Two of my aunties hold this Rimmel lipstick as their Holy Grail lip colour, which isn't surprising. Asia's muted plum colour is universally flattering, deepening the natural lip colour. The formula is super creamy, being hydrating to the lips but staying on for at least four hours. 

Whilst this is hailed as an amazing lip stick, I use it as something quite different. I've tried many cream blushers and often find them lacking, they tend to dry out quickly, the finish can be chalky,  No7 cream blushes in particular annoy me with their flimsy plastic pan packaging. I've been using this for two years as my number 1 cream blusher. 


I reach for this when I'm going for a natural, no make up look. Since powdered skin looks very 'done', this gives strong, natural colour without losing the youthful dewy skin appearance. I usually pair this with a lightweight foundation (Garnier BB cream or Bourjouis Healthy Mix Serum) and a cream highlighter (ELF). 

I slick it on just under my cheekbones, dragging it half way across my cheek, blend it in (sometimes giving it two coats), and I'm done. 


Rimmel's Asia gives me such a natural colour, it produces such a realistic looking flush. The formula is creamy so it blends really smoothly, but doesn't appear shiny on the skin. Since the rubbing of your skin will cause a slightly reddened affect I'd recommend waiting a few seconds to check the final colour, so that more can be applied if necessary. 


The packaging is sturdy and chic, the metallic ring around the middle is a hint of high end. I keep one of these in my vanity table and one in my hand bag; it's perfect for a little pick me up half way through the day for both the lips and the cheeks. It's £4.99 at Boots so won't break the bank either.


Related Posts Plugin for WordPress, Blogger...