Friday 22 February 2013

Review | Rimmel Apocalips Lip Lacquers | Abi Girl

Review:
Rimmel Apocalips Lip Lacquers 
(with swatches)

I know, I know, there are already a plethora of reviews for this product. But these lip lacquers are so amazing I couldn't resist giving my little 2cents worth to the internet, such is my love for Rimmel Apocalips! 


The concept of a lip lacquer is almost like an extremely pigmented tinted lipgloss. Actually it's like a lipstick and a lipgloss had a romantic fling and the love child is this perfect combination of colour and glossiness! 

The way these work... It's very unique. They go on like a thick gloss. They shine, they reflect, they make your lips look like shiny sweeties! Then, after about an hour, the gloss will wear off and you're left with this very strong colour. Like a lipstick! Obviously you can re-apply to get that shine back but if you've not got the tube on your person, or if you forget, you still have this beautiful colour left. 


They act almost like a stain... although if you're thinking 'stain' that leaves your lips faintly but permanently coloured for days, think again. The stain lasts as long as you want it to. It The colour wont come off on your drinking glass but will easily come off with your normal make up remover or even a thoroughly used tissue!

The colour range is really good, eight shades including nudes, pinks, reds and mauves (and one orange shade for good measure!)

The colours I went for are Nude Eclipse, Galaxy and Apocaliptic:


Nude Eclipse
This is a very true nude, it's a cool pinky almost greyish hue. It's a perfect every day nude, the gloss. Whilst this colour isn't as strong as the rest of the colour range, the 'lipstick' colour that remains once the gloss is gone is still strong. As with all nudes, you'll need to make sure that your lips are conditioned to avoid that white residue look! (I hope you guys know what I mean by that!)


Galaxy
This is a very deep plum colour. I think it's so sophisticated, dramatic but subtle at the same time. It's definitely a more grown up colour than the others in the range. It goes on very strongly but once the gloss fades, the colour becomes more 'lived-in' and, well, more wearable. 


I think this shade is perfect for day or evening. I do think it might suit warmer skin types more than cooler but don't let that put you off at least giving it a try!


Apocaliptic
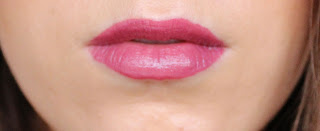
Since this shade is eponymous for the product, I would probably say that Apocaliptic is the flagship colour for these lip lacquers. I just couldn't resist buying it, it's so striking and wild! I don't think my photos do it justice, my boyfriend describes it as red but I'd call it a cherry pink, fuchsia in some lights. 


This looks so shiny and luscious on the lips, and the colour gives such a POP to your face. I could pair this with a very minimal makeup look for a modern twist. 

I must say that with this colour especially, you need to be very careful with the way you apply it. You can't do this whilst walking, or without a mirror... At least not very easily. Take care when putting this on to avoid a Joker smile :)


Price
These are £6.99 each, although I picked mine up on a 3 for 2 offer at Boots. For such an amazing product the price is just fantastic. I may even go back for more colours!

Packaging
The packaging is interesting... I love that the colours are easily visible in the tube, it makes it easy to find the colour I want. The doefoot applicator is great, it makes it so simple to apply neatly and precisely. I usually like my lipsticks/glossy to be simplistic and classic by the way of packaging and these are very, gimmicky, however I won't let that stop me from loving these badgers!


Summary
I love them. I don't know what else to say! Go buy these. I'd like to add that I bought these with my own money and receive zero monies for this review, I genuinely think they are awesome. I heard a rumour that these are a dupe for the YSL glossy stains, I cannot comment on this I've never tried them and why would I?! These are so cheap they tick all my boxes!
They smell nice, they feel glossy, not at all sticky. SO reasonably priced. This is just a rave review for the truly splendid Rimmel Apocalips Lip Lacquers. I always thought I was a lipstick girl but I think I'm almost converted to the lip lacquer trend! 

Have you guys tried these? Which colours are your favourites and which should I buy next?!


How to | Tint/Dye Your Eyebrows and Eyelashes Tutorial | Abigirl

How To Dye / Tint Your Own Eyelashes and Eyebrows (Tutorial)

*I am wearing foundation in the after shot, but absolutely 
nothing on my eyelashes and eyebrows!*

I've been tinting my eyelashes and eyebrows for about three years now. Every 8-8 weeks it's a bit of a ritual for me. The subtle effect just makes me feel that much more confident about myself without make up on. Additionally, since I've started dying my hair dark, my fair eyebrows just don't look right against the mahogany of my hair! 

The cost of having this done at a salon is at least 10x more expensive per session than doing it yourself. Additionally, the way I apply the dye, I keep my eyes open and apply like mascara. This way I can get on with my chores while the dye is working away. When I had my eyelashes tinted at a salon, my eyes were closed during the application, and the technician kind of soaked my eyes with the dye. It got into my eyes and hurt like a female dog! Plus, she painted over my expensive manicure with a strange iridescent blue colour while it was going on, I was too polite to say anything (being British and all) as she felt like she was doing me a favour :(

First things first: Safety. Make sure you do a patch test before using any eyelash dye product. One of my eyelash dyes actually says 'POISON' on the tube, so be very wary. You only get one set of eyes in your life so be extra careful. On the box it will say to do a patch test behind your ear 24-48 hours before using on your lashes. 

Choosing the product. I've used a range of products but I can highly recommend Eylure in dark brown and black (I've not tried blue-black so cannot vouch for it, although I've heard wonderful things!)

What you'll need: 


The dye kit will consist of:
  • Dye (obviously!)
  • Accelerator fluid
  • A spoolie/applicator wand
  • A mixing tray
Extras that I use are:
  • A clean mascara wand
  • Egg cups (I find them easier to clean and mix in than the flimsy plastic tray provided)
  • Vaseline (very important)
  • Q Tips/Cotton buds
  • A watch/timer. Something to keep an eye on development time
  • Cleanser 
  • Cotton pads
I generally dye my eyebrows and eyelashes in the same session. I use black on my lashes and Eyelure's dark brown eyelash dye for my eyebrows. 

Step 1
Mix your dye and accelerator fluid. Again, I do this in an egg cup purely because I can work a little harder with the spoolie to mix it more easily. Make sure you're using more accelerator than dye, the ratio varies from product to product but generally it's 1:3 I think. 


Step 2
Prep your eye area. Using a q-tip/coton bud or your finger, buff vaseline into your eyelids and any skin around your eyelashes that you DON'T want to be stained black. If you skip this step, you run the risk of having a permanent 'I slept in my make up and have dramatic panda face' look! 
This step should be repeated around your eyebrows. It's really difficult to get rid of the stain so be prepared!
That being said, try not to get vaseline on the hairs that you want to dye. Since the vaseline acts as a barrier to the dye, you don't want to get the vaseline on your actual lashes/brows!


Step 3
Apply the dye. For my eyelashes I use a old clean mascara brush. I just find that the fat wand gives me a better application, but that's just my humble personal opinion. I roll the wand in the dye and place the brush at the base of my lashes (being careful not to get any in my eye!). I then shake/zigzag the brush up my lashes from root to tip. 
I then look down and do the same from above. I do this because my lashes are noticeably blond at the roots when I look down (see the before and after, I didn't quite manage dying that on this attempt!)
For my bottom lashes, I do the same but try to use the end of the brush for a more precise application. 

I then roll a cotton bud in vaseline and clean up the dye on my skin, going back over with the dry end to extra sure I don't dye my eyelids!


Step 4
Waiting! On the box it recommends a 5-10 minute development time. However I generally do 15-20 minutes. I experimented and increased the time gradually, finding that 10 minutes just didn't give a dramatic enough look for me. This is where the timer comes in. 

Step 5 
Eyebrow time! The wait time for eyebrows is 1-2 minutes. I stick to this! First time I did this I thought "phhffftt, that cannot be long enough!" and left it on for 5 minutes. As a result, my lashes went from blonde to black. My mum said to me "Abi you need to take off that eyebrow pencil it's too dark". I had to awkwardly explain that it would look that way for 6 weeks. Oops! 


I start mixing the eyebrow dye about 5 minutes before I want to take off the eyelash dye. This way I can apply it (with the smaller spoolie), let it develop and then remove both the eyelash and eyebrow dye simultaneously. 

Step 6
20 minutes after I finished applying the eyelash dye and 2 minutes after applying the brow dye, I'll squirt some cleanser (in my case, Cetaphil) onto a cotton pad and swipe off the dye. This part can sting so be careful! I usually wash my face with warm water to make extra sure all the dye is removed.

And voila! Subtle but noticeably darker brows and eyelashes!


I can't ever see myself not tinting my eyelashes and eyebrows, I think it just enhances the way I look without make up on. If I'm having a really lazy make up day I can just apply 8 hour cream/vaseline as a clear mascara to my eyelashes to give them extra length. 

Hope you found this 'how to dye your eyelashes' tutorial helpful/interesting! Let me know if you have any questions! 


Related Posts Plugin for WordPress, Blogger...